Difference between revisions of "Testpage general 2"
(Created page with "== Required equipment == In this picture you can see all the equipment and already prepared materials you need for the assembly of the One Cup One Life and the production of t...") |
(Tag: Visual edit) |
||
| Line 1: | Line 1: | ||
| − | == Required equipment == | + | == Production of the OneCup OneLife == |
| + | |||
| + | === Required equipment === | ||
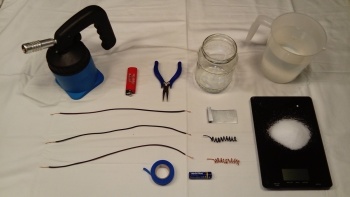
In this picture you can see all the equipment and already prepared materials you need for the assembly of the One Cup One Life and the production of the GANS Plasma Water. In the following you will find all materials and the necessary steps described in detail | In this picture you can see all the equipment and already prepared materials you need for the assembly of the One Cup One Life and the production of the GANS Plasma Water. In the following you will find all materials and the necessary steps described in detail | ||
| Line 17: | Line 19: | ||
<div style="clear:both;"></div> | <div style="clear:both;"></div> | ||
| − | == Production of the bare Copper coil == | + | === Production of the bare Copper coil === |
For the One Cup One Life, two coils are made from stranded Copper wire. For one of them bare wire is used and for one of them Nano-coated wire. Approx. 30 cm of wire is needed per coil. | For the One Cup One Life, two coils are made from stranded Copper wire. For one of them bare wire is used and for one of them Nano-coated wire. Approx. 30 cm of wire is needed per coil. | ||
| − | + | ==== Preparation of the Copper stranded wire ==== | |
| − | === Preparation of the Copper stranded wire === | ||
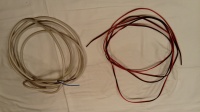
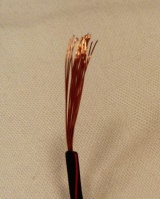
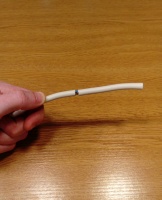
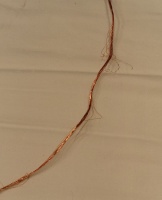
Stranded wire is characterized by the fact that many small strands together form a wire. (See photo). You can find it in the hardware store, at an electrical store, or in an emergency at home in the power cable of the hairdryer, radio, television, coffee machine, etc. To do this, simply '''unplug''' the power cable from the outlet. Cut the entire electrical cord off of the appliance to use the whole cord. | Stranded wire is characterized by the fact that many small strands together form a wire. (See photo). You can find it in the hardware store, at an electrical store, or in an emergency at home in the power cable of the hairdryer, radio, television, coffee machine, etc. To do this, simply '''unplug''' the power cable from the outlet. Cut the entire electrical cord off of the appliance to use the whole cord. | ||
| Line 27: | Line 28: | ||
File:OneCup OneLife - Stranded wire.jpg| | File:OneCup OneLife - Stranded wire.jpg| | ||
</gallery> | </gallery> | ||
| − | ===Removing the plastic from the wire=== | + | ====Removing the plastic from the wire==== |
Usually there are two or three wires in a power cable. The plastic outer sheath must first be removed. There are several ways to do this. (If you buy stranded wires separately, this step is not necessary) | Usually there are two or three wires in a power cable. The plastic outer sheath must first be removed. There are several ways to do this. (If you buy stranded wires separately, this step is not necessary) | ||
| − | ====Variant 1==== | + | =====Variant 1===== |
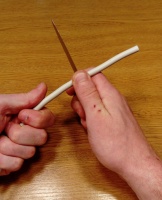
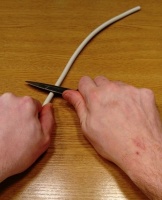
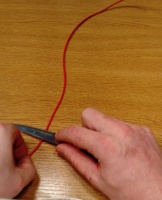
One way to remove the outer sheath is to have the knife in one hand, place the cable on it and press it with your thumb carefully. With the other hand, as well as with the thumb you turn the cable and the knife cuts deeper and deeper into the plastic. Once you have reached the inner wires you can pull the separated plastic part from the inner wires. This is how you proceed step by step until the inner cables are exposed.<gallery mode="nolines" widths="200" heights="200"> | One way to remove the outer sheath is to have the knife in one hand, place the cable on it and press it with your thumb carefully. With the other hand, as well as with the thumb you turn the cable and the knife cuts deeper and deeper into the plastic. Once you have reached the inner wires you can pull the separated plastic part from the inner wires. This is how you proceed step by step until the inner cables are exposed.<gallery mode="nolines" widths="200" heights="200"> | ||
File:OneCup OneLife - Cutting and Stripping off the wire 1.jpg| | File:OneCup OneLife - Cutting and Stripping off the wire 1.jpg| | ||
| Line 37: | Line 38: | ||
File:OneCup OneLife - Cutting and Stripping off the wire 5.jpg| | File:OneCup OneLife - Cutting and Stripping off the wire 5.jpg| | ||
</gallery> | </gallery> | ||
| − | ====Variant 2==== | + | =====Variant 2===== |
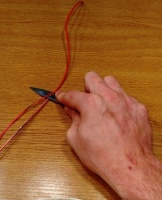
Another possibility is to place the cable on the table and hold it with one hand. Press the blade at a slight angle and with the other hand simply pull the cable backwards against the cutting direction. This way you take off a part of the plastic and can take the wires out. | Another possibility is to place the cable on the table and hold it with one hand. Press the blade at a slight angle and with the other hand simply pull the cable backwards against the cutting direction. This way you take off a part of the plastic and can take the wires out. | ||
| Line 47: | Line 48: | ||
File:OneCup OneLife - Cutting the plastic around the wires with a knife 5.jpg| | File:OneCup OneLife - Cutting the plastic around the wires with a knife 5.jpg| | ||
</gallery> | </gallery> | ||
| − | ===Stripping off the plastic around the strands=== | + | ====Stripping off the plastic around the strands==== |
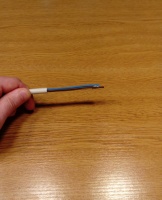
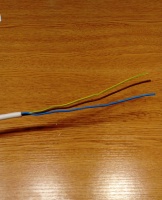
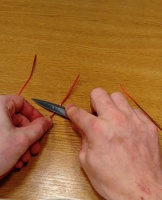
Now you have exposed 2 or 3 wires, which are also covered with plastic. For these wires it is best to use variant 2 to remove the plastic. Do the same as above, especially with the stranded wire, it might require some practice. Put the knife with the cutting edge back at a slight angle, with a little pressure on the plastic and pull the wire with the other hand underneath. If you hold the knife too steep, or press too hard, you might cut into the thin strands, if you hold it too loosely, you might slide up over the plastic and start again at the same place. Don't worry, a few cut-through strands are no problem. With some practice you will get better quickly. Remove the plastic completely.<gallery mode="nolines" widths="200" heights="200"> | Now you have exposed 2 or 3 wires, which are also covered with plastic. For these wires it is best to use variant 2 to remove the plastic. Do the same as above, especially with the stranded wire, it might require some practice. Put the knife with the cutting edge back at a slight angle, with a little pressure on the plastic and pull the wire with the other hand underneath. If you hold the knife too steep, or press too hard, you might cut into the thin strands, if you hold it too loosely, you might slide up over the plastic and start again at the same place. Don't worry, a few cut-through strands are no problem. With some practice you will get better quickly. Remove the plastic completely.<gallery mode="nolines" widths="200" heights="200"> | ||
File:OneCup OneLife - Stripping of plastic around the strands 1.jpg| | File:OneCup OneLife - Stripping of plastic around the strands 1.jpg| | ||
| Line 54: | Line 55: | ||
File:OneCup OneLife - Stripping of plastic around the strands 4.jpg| | File:OneCup OneLife - Stripping of plastic around the strands 4.jpg| | ||
</gallery> | </gallery> | ||
| − | ===Twisting together the individual strands of the wire=== | + | ====Twisting together the individual strands of the wire==== |
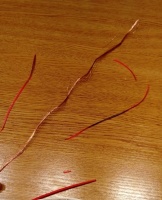
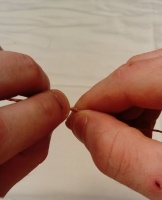
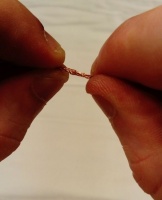
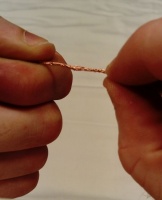
Hold one end of the wire strands in one hand and the other end in the other hand. With your fingers twist the strands together starting on one end and continue to twisting all the way to the other end. Make sure you are twisting the strands firmly together and have secured any fine strands that were cut short into the group.<gallery mode="nolines" widths="200" heights="200"> | Hold one end of the wire strands in one hand and the other end in the other hand. With your fingers twist the strands together starting on one end and continue to twisting all the way to the other end. Make sure you are twisting the strands firmly together and have secured any fine strands that were cut short into the group.<gallery mode="nolines" widths="200" heights="200"> | ||
File:OneCup OneLife - Twisting the strands together 1.jpg| | File:OneCup OneLife - Twisting the strands together 1.jpg| | ||
| Line 62: | Line 63: | ||
File:OneCup OneLife - Twisting the strands together 5.jpg| | File:OneCup OneLife - Twisting the strands together 5.jpg| | ||
</gallery> | </gallery> | ||
| − | ===Winding of the coil=== | + | ====Winding of the coil==== |
To wind the coil, take a pencil, or something else round and hold it together with the end of the wire in one hand. With the other hand you wrap the wire completely around the cable. Now tighten both ends of the wire again so that it fits tightly and push the windings together. The coil is ready and can be taken off the pencil.<gallery mode="nolines" widths="200" heights="200"> | To wind the coil, take a pencil, or something else round and hold it together with the end of the wire in one hand. With the other hand you wrap the wire completely around the cable. Now tighten both ends of the wire again so that it fits tightly and push the windings together. The coil is ready and can be taken off the pencil.<gallery mode="nolines" widths="200" heights="200"> | ||
File:OneCup OneLife - Winding of the coil 1.jpg| | File:OneCup OneLife - Winding of the coil 1.jpg| | ||
| Line 70: | Line 71: | ||
File:OneCup OneLife - Winding of the coil 5.jpg| | File:OneCup OneLife - Winding of the coil 5.jpg| | ||
</gallery> | </gallery> | ||
| − | ==Creating the Nano-coated coil== | + | ===Creating the Nano-coated coil=== |
| − | ===Nano-coating of the wire for the second coil=== | + | ====Nano-coating of the wire for the second coil==== |
Before the wire is wound to the second coil, it must be Nano-coated. This requires a gas burner. You turn on the gas and ignite carefully. Hold one end of the wire with pliers. With your other hand you carefully hold the other end of the wire with your fingers. Starting with the side held by the pliers, you hold the wire in the fire until it glows. As the wire heats up it will begin to turn red so be careful the end of the wire can become hot. Move steadily down the wire to the other end. The whole wire becomes red-hot and turns black. Before it gets too hot at the other end of the hand, you stop and put the wire on something solid and let it cool down. The whole wire has to get black. To do this, you can repeat the process from one side to the other. Remember the wire must glow red even at the ends. Allow the wire to cool down then proceed to the next step. | Before the wire is wound to the second coil, it must be Nano-coated. This requires a gas burner. You turn on the gas and ignite carefully. Hold one end of the wire with pliers. With your other hand you carefully hold the other end of the wire with your fingers. Starting with the side held by the pliers, you hold the wire in the fire until it glows. As the wire heats up it will begin to turn red so be careful the end of the wire can become hot. Move steadily down the wire to the other end. The whole wire becomes red-hot and turns black. Before it gets too hot at the other end of the hand, you stop and put the wire on something solid and let it cool down. The whole wire has to get black. To do this, you can repeat the process from one side to the other. Remember the wire must glow red even at the ends. Allow the wire to cool down then proceed to the next step. | ||
| Line 84: | Line 85: | ||
</gallery> | </gallery> | ||
| − | === Winding of the Nano-coated coil === | + | ==== Winding of the Nano-coated coil ==== |
The Nano-coated coil is winded on a pencil like the bare coil.<gallery mode="nolines" widths="200" heights="200"> | The Nano-coated coil is winded on a pencil like the bare coil.<gallery mode="nolines" widths="200" heights="200"> | ||
File:OneCup OneLife - Winding the Nano-coated coil (2).jpg| | File:OneCup OneLife - Winding the Nano-coated coil (2).jpg| | ||
| Line 90: | Line 91: | ||
</gallery> | </gallery> | ||
| − | == Preparing the Zinc plate == | + | === Preparing the Zinc plate === |
Use only pure Zinc for the Zinc plate, or wire. Don’t use galvanized Iron, or chicken wire. You can get it in the hardware store, at the plumber, or in an emergency from the roof of a house, or from a battery. The cover of batteries is often made of Zinc, but this depends on which continent or country you live in. You can test the cover with a magnet. If the magnet sticks, it is not Zinc. Video: [[How to extract a Zinc plate from a battery]]. | Use only pure Zinc for the Zinc plate, or wire. Don’t use galvanized Iron, or chicken wire. You can get it in the hardware store, at the plumber, or in an emergency from the roof of a house, or from a battery. The cover of batteries is often made of Zinc, but this depends on which continent or country you live in. You can test the cover with a magnet. If the magnet sticks, it is not Zinc. Video: [[How to extract a Zinc plate from a battery]]. | ||
| Line 98: | Line 99: | ||
</gallery> | </gallery> | ||
| − | == Preparing three connection wires == | + | === Preparing three connection wires === |
For connecting the Zinc plate, bare coil and Nano-coated coil with a battery, 3 connection wires are needed. For these connections stranded wires or a single solid pure Copper wire can be used. Cut the wires in 30cm pieces. Strip off the plastic 2-5cm on each end of each wire. You will need one end of one wire to be stripped a little longer to connect the Zinc plate. <gallery mode="nolines" widths="200" heights="200"> | For connecting the Zinc plate, bare coil and Nano-coated coil with a battery, 3 connection wires are needed. For these connections stranded wires or a single solid pure Copper wire can be used. Cut the wires in 30cm pieces. Strip off the plastic 2-5cm on each end of each wire. You will need one end of one wire to be stripped a little longer to connect the Zinc plate. <gallery mode="nolines" widths="200" heights="200"> | ||
File:OneCup OneLife - Preparing the connecting wires 1.jpg| | File:OneCup OneLife - Preparing the connecting wires 1.jpg| | ||
File:OneCup OneLife - Preparing the connecting wires 2.jpg| | File:OneCup OneLife - Preparing the connecting wires 2.jpg| | ||
</gallery> | </gallery> | ||
| − | ==Connecting the bare Copper coil and Zinc plate== | + | ===Connecting the bare Copper coil and Zinc plate=== |
| − | + | ==== Connecting the bare Copper coil ==== | |
| − | === Connecting the bare Copper coil === | ||
To connect the bare Copper coil to the connecting wire, simply twist the ends of the wires together.<gallery mode="nolines" widths="200" heights="200"> | To connect the bare Copper coil to the connecting wire, simply twist the ends of the wires together.<gallery mode="nolines" widths="200" heights="200"> | ||
File:OneCup OneLife - Connecting the blank Copper coil 1.jpg| | File:OneCup OneLife - Connecting the blank Copper coil 1.jpg| | ||
| Line 111: | Line 111: | ||
File:OneCup OneLife - Connecting the blank Copper coil.jpg| | File:OneCup OneLife - Connecting the blank Copper coil.jpg| | ||
</gallery> | </gallery> | ||
| − | ==Connecting the Zinc plate== | + | ===Connecting the Zinc plate=== |
To connect the Zinc plate with the connecting cable, use the longer stripped part of the connecting wire. Wrap it around the Zinc plate as shown on the pictures and twist the Copper wire firmly together.<gallery mode="nolines" widths="200" heights="200"> | To connect the Zinc plate with the connecting cable, use the longer stripped part of the connecting wire. Wrap it around the Zinc plate as shown on the pictures and twist the Copper wire firmly together.<gallery mode="nolines" widths="200" heights="200"> | ||
File:OneCup OneLife - Connecting the Zinc plate 1.jpg| | File:OneCup OneLife - Connecting the Zinc plate 1.jpg| | ||
| Line 117: | Line 117: | ||
File:OneCup OneLife - Connecting the Zinc plate 3.jpg| | File:OneCup OneLife - Connecting the Zinc plate 3.jpg| | ||
</gallery> | </gallery> | ||
| − | + | ==== Connecting the two connecting wires together ==== | |
| − | === Connecting the two connecting wires together === | ||
Twist the two wires at the other ends together.<gallery mode="nolines" widths="200" heights="200"> | Twist the two wires at the other ends together.<gallery mode="nolines" widths="200" heights="200"> | ||
File:OneCup OneLife - Twisting the connection Wires together.jpg| | File:OneCup OneLife - Twisting the connection Wires together.jpg| | ||
</gallery> | </gallery> | ||
| − | == Creating the Copper bridge and connecting the Nano-coated Copper coil == | + | === Creating the Copper bridge and connecting the Nano-coated Copper coil === |
A Copper bridge is required to suspend the Nano-coated Copper coil in the middle of the glass. To do this, you bend a single strand of Copper wire into a bridge, so that it fits on the glass as shown in the picture. Next, attach the end of the Nano-coated Copper coil to the middle of the bridge. The Nano-coated wire is simply wrapped around the bridge. One end of the third stripped wire is attached to one of the sides of the bridge.<gallery mode="nolines" widths="200" heights="200"> | A Copper bridge is required to suspend the Nano-coated Copper coil in the middle of the glass. To do this, you bend a single strand of Copper wire into a bridge, so that it fits on the glass as shown in the picture. Next, attach the end of the Nano-coated Copper coil to the middle of the bridge. The Nano-coated wire is simply wrapped around the bridge. One end of the third stripped wire is attached to one of the sides of the bridge.<gallery mode="nolines" widths="200" heights="200"> | ||
File:OneCup OneLife - Connecting the Nano-coated Copper coil 1.jpg| | File:OneCup OneLife - Connecting the Nano-coated Copper coil 1.jpg| | ||
| Line 132: | Line 131: | ||
</gallery> | </gallery> | ||
| − | == Placing the coils and Zinc on the cup == | + | === Placing the coils and Zinc on the cup === |
The Nano-coated Copper coil is wound around the bridge and placed in the middle of the glass. The bare Copper coil and the Zinc plate are attached to the opposite edge of the glass, facing each other and facing inwards. The connecting wires all face one direction to be connected to the battery.<gallery mode="nolines" widths="200" heights="200"> | The Nano-coated Copper coil is wound around the bridge and placed in the middle of the glass. The bare Copper coil and the Zinc plate are attached to the opposite edge of the glass, facing each other and facing inwards. The connecting wires all face one direction to be connected to the battery.<gallery mode="nolines" widths="200" heights="200"> | ||
File:OneCup OneLife - Placing the coils and Zinc on the cup 1.jpg| | File:OneCup OneLife - Placing the coils and Zinc on the cup 1.jpg| | ||
| Line 139: | Line 138: | ||
</gallery> | </gallery> | ||
| − | == Connecting the battery to the connection wires == | + | === Connecting the battery to the connection wires === |
The two twisted connecting wires of the Zinc plate and the bare Copper coil are attached to the positive (+) pole of the battery with adhesive tape. The connecting wire from the Nano-coated coil is connected to the negative (-) pole of the battery. | The two twisted connecting wires of the Zinc plate and the bare Copper coil are attached to the positive (+) pole of the battery with adhesive tape. The connecting wire from the Nano-coated coil is connected to the negative (-) pole of the battery. | ||
| Line 150: | Line 149: | ||
</gallery> | </gallery> | ||
| − | == Creating the 15% salt water mixture: Is 150 grams per 1 liter clean water == | + | === Creating the 15% salt water mixture: Is 150 grams per 1 liter clean water === |
Create a 15% salt water mixture and empty it in the cup. The Copper coils and the Zinc should look only a little bit out of the water. | Create a 15% salt water mixture and empty it in the cup. The Copper coils and the Zinc should look only a little bit out of the water. | ||
| Line 159: | Line 158: | ||
</gallery> | </gallery> | ||
| − | == You will see soon bubbles rising to the surface == | + | == Production of Amino Acids, GANS == |
| + | |||
| + | === You will see soon bubbles rising to the surface === | ||
That is the starting process of your One Cup One Life that will form simultaneously your Amino Acid fatty looking layer on your surface and also the GANS at the bottom of your cup. (From left to right: Nano-coated wire with bubbles, Amino Acids, GANS)<gallery mode="nolines" widths="200" heights="200"> | That is the starting process of your One Cup One Life that will form simultaneously your Amino Acid fatty looking layer on your surface and also the GANS at the bottom of your cup. (From left to right: Nano-coated wire with bubbles, Amino Acids, GANS)<gallery mode="nolines" widths="200" heights="200"> | ||
File:OneCup OneLife - Nano-coated coil Bubbles.jpg| | File:OneCup OneLife - Nano-coated coil Bubbles.jpg| | ||
| Line 166: | Line 167: | ||
</gallery> | </gallery> | ||
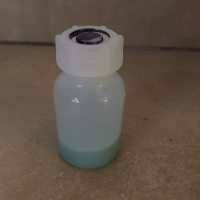
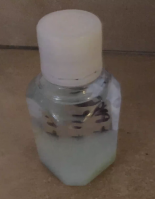
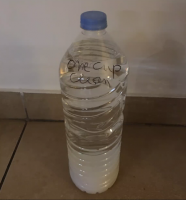
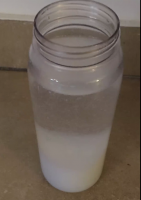
| − | == Different cups One Cup One Life producing GANS == | + | === Different cups One Cup One Life producing GANS === |
<gallery mode="nolines" widths="200" heights="200"> | <gallery mode="nolines" widths="200" heights="200"> | ||
File:OneCup OneLife - Production 4.png| | File:OneCup OneLife - Production 4.png| | ||
| Line 178: | Line 179: | ||
| − | + | === Protect and check === | |
| − | == Protect and check == | + | ==== Do the nose and breath test ==== |
| − | |||
| − | === Do the nose and breath test === | ||
| − | |||
Pinch your nose with your fingers and hold your breath for 10 seconds every morning. If you don’t cough within the 10 seconds and if can hold your breath for 10 seconds, you are okay. | Pinch your nose with your fingers and hold your breath for 10 seconds every morning. If you don’t cough within the 10 seconds and if can hold your breath for 10 seconds, you are okay. | ||
Repeat test before going to bed. | Repeat test before going to bed. | ||
| − | === Other signs to look for === | + | ==== Other signs to look for ==== |
Other signs are cold sweats, feeling feverish, but no actual fever present. | Other signs are cold sweats, feeling feverish, but no actual fever present. | ||
| Line 200: | Line 198: | ||
| − | == Mr. Keshe explained why the application of the One Cup One Life with this Coronavirus epidemic == | + | === Mr. Keshe explained why the application of the One Cup One Life with this Coronavirus epidemic === |
| − | |||
=== Application prevention and reversal === | === Application prevention and reversal === | ||
The field strength of the GANS is continuously transferred to the water. | The field strength of the GANS is continuously transferred to the water. | ||
| Line 208: | Line 205: | ||
| − | == Material preparation == | + | === Material preparation === |
[[File:OneCup OneLife - Materials needed to extract the GANS 2.jpg|right|frameless|262x262px]] | [[File:OneCup OneLife - Materials needed to extract the GANS 2.jpg|right|frameless|262x262px]] | ||
| − | + | ==== Materials needed to extract the GANS from the One Cup One Life ==== | |
| − | === Materials needed to extract the GANS from the One Cup One Life === | ||
| − | |||
[[File:OneCup OneLife - Materials needed to extract the GANS (2).jpg|left|frameless|400x400px]] | [[File:OneCup OneLife - Materials needed to extract the GANS (2).jpg|left|frameless|400x400px]] | ||
| Line 227: | Line 222: | ||
| − | ===First application, how to remove first the Amino Acids from the One Cup One Life before removing the GANS === | + | ====First application, how to remove first the Amino Acids from the One Cup One Life before removing the GANS ==== |
==== Method ==== | ==== Method ==== | ||
With a plastic spoon, gently remove the Amino Acids that are floating on the top. These are a fatty looking layers floating on the surface of your One Cup One Life. Place these Amino Acids in your <u>1st glass jar</u> to keep for further application. | With a plastic spoon, gently remove the Amino Acids that are floating on the top. These are a fatty looking layers floating on the surface of your One Cup One Life. Place these Amino Acids in your <u>1st glass jar</u> to keep for further application. | ||
| Line 240: | Line 235: | ||
| − | ==== IN CASE OF EMERGENCY: Second application of the Amino Acids ==== | + | ===== IN CASE OF EMERGENCY: Second application of the Amino Acids ===== |
The Amino Acids can also be applied as a source of nutrition. Simply dip your finger in the top layer of the Amino Acids once or twice a day and put it in your mouth. | The Amino Acids can also be applied as a source of nutrition. Simply dip your finger in the top layer of the Amino Acids once or twice a day and put it in your mouth. | ||
| Line 251: | Line 246: | ||
| − | === Removing the GANS from the One Cup One Life === | + | ===== Removing the GANS from the One Cup One Life ===== |
Apply the straw to the syringe by taping. Use the syringe to extract the GANS at the bottom of your One Cup One Life. | Apply the straw to the syringe by taping. Use the syringe to extract the GANS at the bottom of your One Cup One Life. | ||
| Line 266: | Line 261: | ||
| − | === Washing of your GANS === | + | ==== Washing of your GANS ==== |
| − | ==== 1st washing of your GANS ==== | + | ===== 1st washing of your GANS ===== |
Add clean water to your <u>2nd glass jar</u> where the GANS you just extracted is present. Let the GANS settle to the bottom of the <u>2nd jar</u> until you have clear Plasma Water above the GANS. <gallery mode="nolines" widths="200" heights="200"> | Add clean water to your <u>2nd glass jar</u> where the GANS you just extracted is present. Let the GANS settle to the bottom of the <u>2nd jar</u> until you have clear Plasma Water above the GANS. <gallery mode="nolines" widths="200" heights="200"> | ||
File:OneCup OneLife - Washing the GANS 0000.jpg| | File:OneCup OneLife - Washing the GANS 0000.jpg| | ||
| Line 291: | Line 286: | ||
</gallery> | </gallery> | ||
| − | ==== 2nd washing of your GANS ==== | + | ===== 2nd washing of your GANS ===== |
Add clean water to your <u>2nd glass jar</u> where the GANS you just extracted is present. Let the GANS settle to the bottom of the <u>2nd jar</u> until you have clear Plasma Water above the GANS. You just save this salty water into your extra reserve bottle. | Add clean water to your <u>2nd glass jar</u> where the GANS you just extracted is present. Let the GANS settle to the bottom of the <u>2nd jar</u> until you have clear Plasma Water above the GANS. You just save this salty water into your extra reserve bottle. | ||
| Line 298: | Line 293: | ||
You need to refresh this jar every day and dispose of this salty Plasma Water into the toilet, or any other safe disposal as it might contain the energy from the virus. | You need to refresh this jar every day and dispose of this salty Plasma Water into the toilet, or any other safe disposal as it might contain the energy from the virus. | ||
| − | ==== 3rd washing of your GANS ==== | + | ===== 3rd washing of your GANS ===== |
Add clean water to your <u>2nd glass jar</u> where the GANS you just extracted is present. Let the GANS settle to the bottom of the <u>2nd jar</u> until you have clear Plasma Water above the GANS. You just save this salty water into your extra reserve bottle. | Add clean water to your <u>2nd glass jar</u> where the GANS you just extracted is present. Let the GANS settle to the bottom of the <u>2nd jar</u> until you have clear Plasma Water above the GANS. You just save this salty water into your extra reserve bottle. | ||
| Line 305: | Line 300: | ||
You need to refresh this jar every day and dispose of this salty Plasma Water into the toilet, or any other safe disposal as it might contain the energy from the virus. | You need to refresh this jar every day and dispose of this salty Plasma Water into the toilet, or any other safe disposal as it might contain the energy from the virus. | ||
| − | ==== 4th or 5th washing of your GANS in case there is any salt residual left in your Plasma Water ==== | + | ===== 4th or 5th washing of your GANS in case there is any salt residual left in your Plasma Water ===== |
Add clean water to your <u>2nd glass jar</u> where the GANS you just extracted is present. Let the GANS settle to the bottom of the <u>2nd jar</u> until you have clear Plasma Water above the GANS. You just dispose of this salty water. | Add clean water to your <u>2nd glass jar</u> where the GANS you just extracted is present. Let the GANS settle to the bottom of the <u>2nd jar</u> until you have clear Plasma Water above the GANS. You just dispose of this salty water. | ||
| − | === Making the Plasma Water ready to be applied === | + | ==== Making the Plasma Water ready to be applied ==== |
Repeat this process of washing until all the salt is removed from the One Cup One Life. | Repeat this process of washing until all the salt is removed from the One Cup One Life. | ||
| Line 334: | Line 329: | ||
| − | === Reusing and working with several cups One Cup One Life === | + | ==== Reusing and working with several cups One Cup One Life ==== |
You can return the salty water from your first washing of your GANS back into the One Cup One Life so that your One Cup One Life keeps on producing GANS. | You can return the salty water from your first washing of your GANS back into the One Cup One Life so that your One Cup One Life keeps on producing GANS. | ||
| Line 354: | Line 349: | ||
| − | === Storing of GANSes === | + | ==== Storing of GANSes ==== |
<gallery mode="nolines" widths="200" heights="200"> | <gallery mode="nolines" widths="200" heights="200"> | ||
File:OneCup OneLife - Storing of GANSes 1.png| | File:OneCup OneLife - Storing of GANSes 1.png| | ||
Revision as of 19:53, 18 March 2020
Contents
- 1 Production of the OneCup OneLife
- 1.1 Required equipment
- 1.2 Production of the bare Copper coil
- 1.3 Creating the Nano-coated coil
- 1.4 Preparing the Zinc plate
- 1.5 Preparing three connection wires
- 1.6 Connecting the bare Copper coil and Zinc plate
- 1.7 Connecting the Zinc plate
- 1.8 Creating the Copper bridge and connecting the Nano-coated Copper coil
- 1.9 Placing the coils and Zinc on the cup
- 1.10 Connecting the battery to the connection wires
- 1.11 Creating the 15% salt water mixture: Is 150 grams per 1 liter clean water
- 2 Production of Amino Acids, GANS
- 2.1 You will see soon bubbles rising to the surface
- 2.2 Different cups One Cup One Life producing GANS
- 2.3 Protect and check
- 2.4 Mr. Keshe explained why the application of the One Cup One Life with this Coronavirus epidemic
- 2.5 Application prevention and reversal
- 2.6 Material preparation
- 2.6.1 Materials needed to extract the GANS from the One Cup One Life
- 2.6.2 First application, how to remove first the Amino Acids from the One Cup One Life before removing the GANS
- 2.6.3 Method
- 2.6.4 Washing of your GANS
- 2.6.5 Making the Plasma Water ready to be applied
- 2.6.6 Reusing and working with several cups One Cup One Life
- 2.6.7 Storing of GANSes
- 3 Application of Plasma Water
- 4 Different additional information
- 5 Finishing words and links for help
Production of the OneCup OneLife
Required equipment
In this picture you can see all the equipment and already prepared materials you need for the assembly of the One Cup One Life and the production of the GANS Plasma Water. In the following you will find all materials and the necessary steps described in detail
Gas burner, fire and tongs
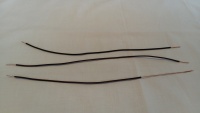
Three connecting wires
Zinc plate, Nano-coated Copper coil and bare Copper coil
Tape and battery
Empty glass, tap water, table salt (without iodine) and scale
Production of the bare Copper coil
For the One Cup One Life, two coils are made from stranded Copper wire. For one of them bare wire is used and for one of them Nano-coated wire. Approx. 30 cm of wire is needed per coil.
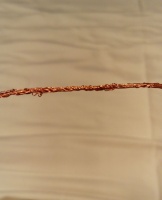
Preparation of the Copper stranded wire
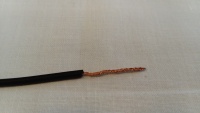
Stranded wire is characterized by the fact that many small strands together form a wire. (See photo). You can find it in the hardware store, at an electrical store, or in an emergency at home in the power cable of the hairdryer, radio, television, coffee machine, etc. To do this, simply unplug the power cable from the outlet. Cut the entire electrical cord off of the appliance to use the whole cord.
Removing the plastic from the wire
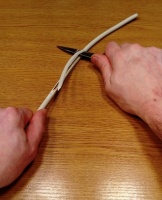
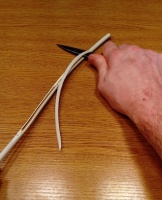
Usually there are two or three wires in a power cable. The plastic outer sheath must first be removed. There are several ways to do this. (If you buy stranded wires separately, this step is not necessary)
Variant 1
One way to remove the outer sheath is to have the knife in one hand, place the cable on it and press it with your thumb carefully. With the other hand, as well as with the thumb you turn the cable and the knife cuts deeper and deeper into the plastic. Once you have reached the inner wires you can pull the separated plastic part from the inner wires. This is how you proceed step by step until the inner cables are exposed.Variant 2
Another possibility is to place the cable on the table and hold it with one hand. Press the blade at a slight angle and with the other hand simply pull the cable backwards against the cutting direction. This way you take off a part of the plastic and can take the wires out.
Everyone has different approaches. With a little bit of trying you will find what way works best for you.Stripping off the plastic around the strands
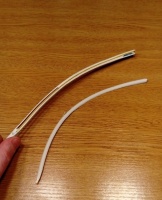
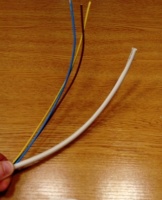
Now you have exposed 2 or 3 wires, which are also covered with plastic. For these wires it is best to use variant 2 to remove the plastic. Do the same as above, especially with the stranded wire, it might require some practice. Put the knife with the cutting edge back at a slight angle, with a little pressure on the plastic and pull the wire with the other hand underneath. If you hold the knife too steep, or press too hard, you might cut into the thin strands, if you hold it too loosely, you might slide up over the plastic and start again at the same place. Don't worry, a few cut-through strands are no problem. With some practice you will get better quickly. Remove the plastic completely.Twisting together the individual strands of the wire
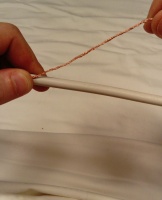
Hold one end of the wire strands in one hand and the other end in the other hand. With your fingers twist the strands together starting on one end and continue to twisting all the way to the other end. Make sure you are twisting the strands firmly together and have secured any fine strands that were cut short into the group.Winding of the coil
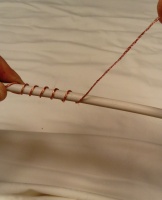
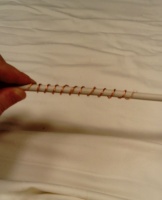
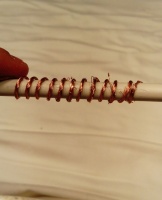
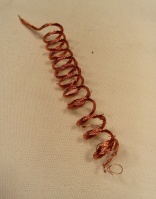
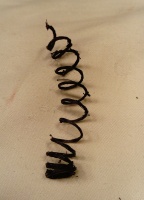
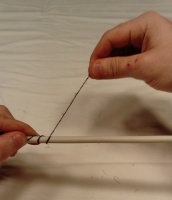
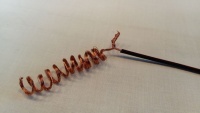
To wind the coil, take a pencil, or something else round and hold it together with the end of the wire in one hand. With the other hand you wrap the wire completely around the cable. Now tighten both ends of the wire again so that it fits tightly and push the windings together. The coil is ready and can be taken off the pencil.Creating the Nano-coated coil
Nano-coating of the wire for the second coil
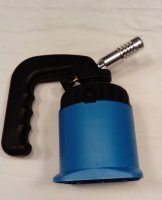
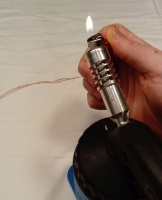
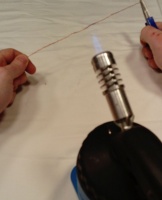
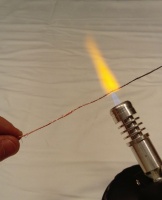
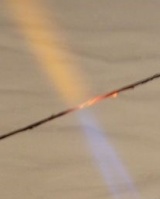
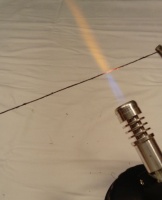
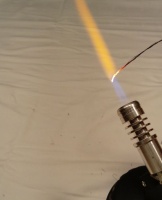
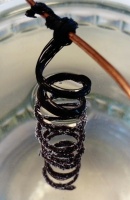
Before the wire is wound to the second coil, it must be Nano-coated. This requires a gas burner. You turn on the gas and ignite carefully. Hold one end of the wire with pliers. With your other hand you carefully hold the other end of the wire with your fingers. Starting with the side held by the pliers, you hold the wire in the fire until it glows. As the wire heats up it will begin to turn red so be careful the end of the wire can become hot. Move steadily down the wire to the other end. The whole wire becomes red-hot and turns black. Before it gets too hot at the other end of the hand, you stop and put the wire on something solid and let it cool down. The whole wire has to get black. To do this, you can repeat the process from one side to the other. Remember the wire must glow red even at the ends. Allow the wire to cool down then proceed to the next step.
Please never cut a Nano-coated wire!Winding of the Nano-coated coil
The Nano-coated coil is winded on a pencil like the bare coil.Preparing the Zinc plate
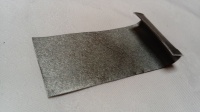
Use only pure Zinc for the Zinc plate, or wire. Don’t use galvanized Iron, or chicken wire. You can get it in the hardware store, at the plumber, or in an emergency from the roof of a house, or from a battery. The cover of batteries is often made of Zinc, but this depends on which continent or country you live in. You can test the cover with a magnet. If the magnet sticks, it is not Zinc. Video: How to extract a Zinc plate from a battery.
When the Zinc plate is ready, it is bent at the top to hang it on the edge of the glass later.Preparing three connection wires
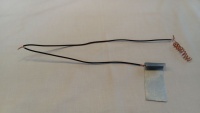
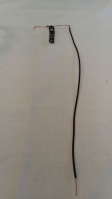
For connecting the Zinc plate, bare coil and Nano-coated coil with a battery, 3 connection wires are needed. For these connections stranded wires or a single solid pure Copper wire can be used. Cut the wires in 30cm pieces. Strip off the plastic 2-5cm on each end of each wire. You will need one end of one wire to be stripped a little longer to connect the Zinc plate.Connecting the bare Copper coil and Zinc plate
Connecting the bare Copper coil
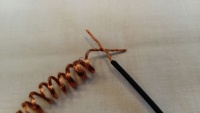
To connect the bare Copper coil to the connecting wire, simply twist the ends of the wires together.Connecting the Zinc plate
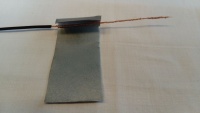
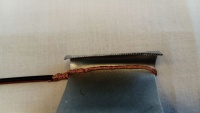
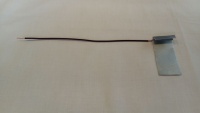
To connect the Zinc plate with the connecting cable, use the longer stripped part of the connecting wire. Wrap it around the Zinc plate as shown on the pictures and twist the Copper wire firmly together.Connecting the two connecting wires together
Twist the two wires at the other ends together.Creating the Copper bridge and connecting the Nano-coated Copper coil
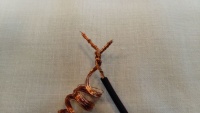
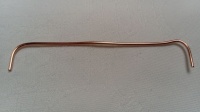
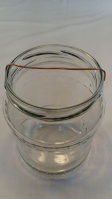
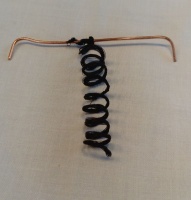
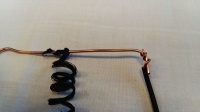
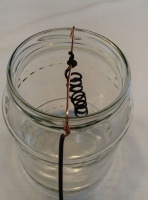
A Copper bridge is required to suspend the Nano-coated Copper coil in the middle of the glass. To do this, you bend a single strand of Copper wire into a bridge, so that it fits on the glass as shown in the picture. Next, attach the end of the Nano-coated Copper coil to the middle of the bridge. The Nano-coated wire is simply wrapped around the bridge. One end of the third stripped wire is attached to one of the sides of the bridge.Placing the coils and Zinc on the cup
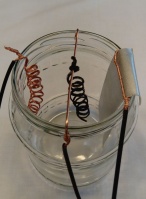
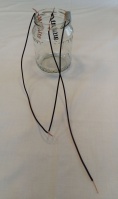
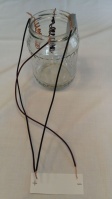
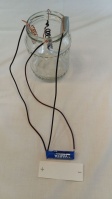
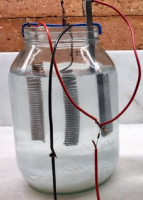
The Nano-coated Copper coil is wound around the bridge and placed in the middle of the glass. The bare Copper coil and the Zinc plate are attached to the opposite edge of the glass, facing each other and facing inwards. The connecting wires all face one direction to be connected to the battery.Connecting the battery to the connection wires
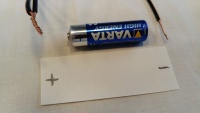
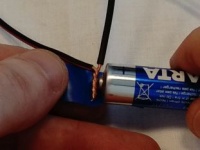
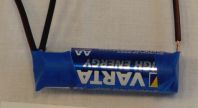
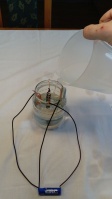
The two twisted connecting wires of the Zinc plate and the bare Copper coil are attached to the positive (+) pole of the battery with adhesive tape. The connecting wire from the Nano-coated coil is connected to the negative (-) pole of the battery.
Connect the connecting wires tightly and firmly to the poles of the battery.Creating the 15% salt water mixture: Is 150 grams per 1 liter clean water
Create a 15% salt water mixture and empty it in the cup. The Copper coils and the Zinc should look only a little bit out of the water.
Production of Amino Acids, GANS
You will see soon bubbles rising to the surface
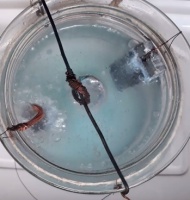
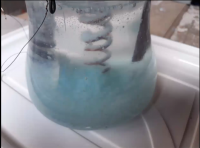
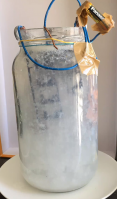
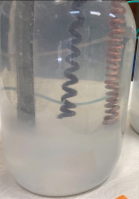
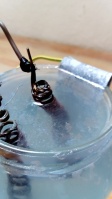
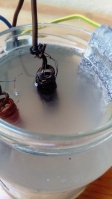
That is the starting process of your One Cup One Life that will form simultaneously your Amino Acid fatty looking layer on your surface and also the GANS at the bottom of your cup. (From left to right: Nano-coated wire with bubbles, Amino Acids, GANS)Different cups One Cup One Life producing GANS
Protect and check
Do the nose and breath test
Pinch your nose with your fingers and hold your breath for 10 seconds every morning. If you don’t cough within the 10 seconds and if can hold your breath for 10 seconds, you are okay.
Repeat test before going to bed.
Other signs to look for
Other signs are cold sweats, feeling feverish, but no actual fever present.
Bad headache.
Pain experienced when pressure is applied on the upper part of the lungs on back side.
Pressure felt when you spray the Plasma Water on your body, neck, head, chest, back and you have difficulty breathing. You should be alerted. These are signs of infection.
If any of these symptoms are present, please let us know in our available channels at the end of this document (Finishing words and links for help).
Application prevention and reversal
The field strength of the GANS is continuously transferred to the water.
The field strength of the Plasma Water withdraws the energy from the virus and it depletes the virus from its field strength and incapacitates the virus.
Material preparation
Materials needed to extract the GANS from the One Cup One Life
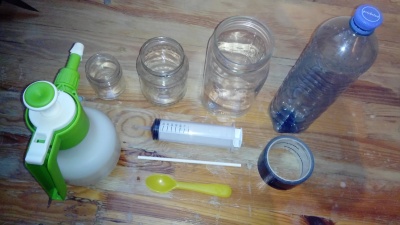
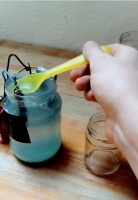
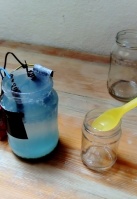
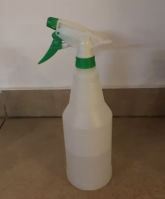
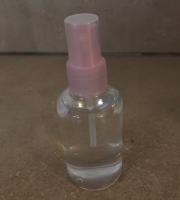
Syringe, plastic spoon, a set of 3 glass jars and reserve bottles; straw, tape, plant spray bottle or small spray bottle.
Avoid using any metals in and around your GANSes, Amino Acids and Plasma Water. Don’t use metal spoons and remove metal lids from your used glasses or any metal in any shape or form.
Before you start, join the syringe and straw with a tape.
First application, how to remove first the Amino Acids from the One Cup One Life before removing the GANS
Method
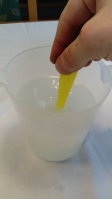
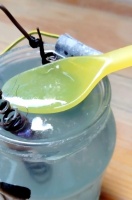
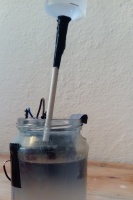
With a plastic spoon, gently remove the Amino Acids that are floating on the top. These are a fatty looking layers floating on the surface of your One Cup One Life. Place these Amino Acids in your 1st glass jar to keep for further application.
IN CASE OF EMERGENCY: Second application of the Amino Acids
The Amino Acids can also be applied as a source of nutrition. Simply dip your finger in the top layer of the Amino Acids once or twice a day and put it in your mouth.
The Amino Acids can be present in the One Cup One Life or saved and put in the 1st glass jar.
Note: This application is only applied in case of starvation and shortage of food or nutrition.
Removing the GANS from the One Cup One Life
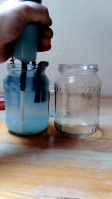
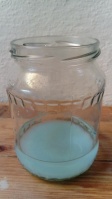
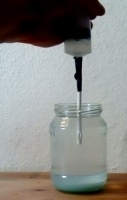
Apply the straw to the syringe by taping. Use the syringe to extract the GANS at the bottom of your One Cup One Life.
The extracted GANS from the bottom of the One Cup One Life, which is now present in the syringe, is put in your 2nd glass jar.
Washing of your GANS
1st washing of your GANS
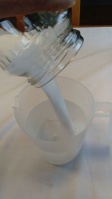
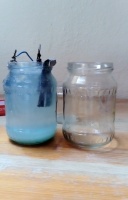
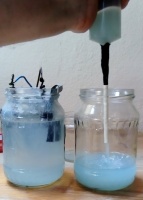
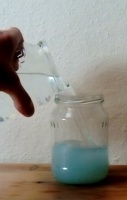
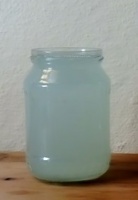
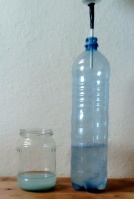
Add clean water to your 2nd glass jar where the GANS you just extracted is present. Let the GANS settle to the bottom of the 2nd jar until you have clear Plasma Water above the GANS.This salty water can be placed around the house in an open jar to deplete any virus present in the room.
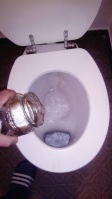
You need to refresh this jar every day and dispose of this salty Plasma Water into the toilet, or any other safe disposal as it might contain the energy from the virus.
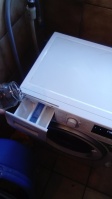
A use for the extra salty Plasma Water is to put it into your washing machine.
2nd washing of your GANS
Add clean water to your 2nd glass jar where the GANS you just extracted is present. Let the GANS settle to the bottom of the 2nd jar until you have clear Plasma Water above the GANS. You just save this salty water into your extra reserve bottle.
This salty water can be placed around the house in an open jar to deplete any virus present in the room.
You need to refresh this jar every day and dispose of this salty Plasma Water into the toilet, or any other safe disposal as it might contain the energy from the virus.
3rd washing of your GANS
Add clean water to your 2nd glass jar where the GANS you just extracted is present. Let the GANS settle to the bottom of the 2nd jar until you have clear Plasma Water above the GANS. You just save this salty water into your extra reserve bottle.
This salty water can be placed around the house in an open jar to deplete any virus present in the room.
You need to refresh this jar every day and dispose of this salty Plasma Water into the toilet, or any other safe disposal as it might contain the energy from the virus.
4th or 5th washing of your GANS in case there is any salt residual left in your Plasma Water
Add clean water to your 2nd glass jar where the GANS you just extracted is present. Let the GANS settle to the bottom of the 2nd jar until you have clear Plasma Water above the GANS. You just dispose of this salty water.
Making the Plasma Water ready to be applied
Repeat this process of washing until all the salt is removed from the One Cup One Life.
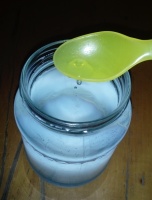
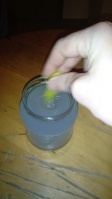
Now you can add a spoon of your saved Amino Acids to your Plasma Water containing the GANS. You shake it and you let the GANS settle down until you have only clean Plasma Water on the top.This gives your Plasma Water the extra field strength through the adding of the field strength of the Amino Acids.
The field strength of the GANS is continuously transferred to the water. This withdraws the energy from the virus and it depletes the virus from its field strength.
For this purpose follow all the correct applications as explained above and below.
Always keep a readymade solution of 1 liter of clean water with 150 grams of normal table salt. The salt is completely dissolved in cold water and you can add to your One Cup One Life or more cups.
*The label on your salt will list iodine if it is present. In case you have iodine present in your salt, replace it with the white sea salt that doesn’t contain iodine. (E 535 (Sodium Ferrocyanide) and E 536 (Potassium Ferrocyanide) are ok, or even beneficial).
Reusing and working with several cups One Cup One Life
You can return the salty water from your first washing of your GANS back into the One Cup One Life so that your One Cup One Life keeps on producing GANS.
Every time you harvest fresh GANSes from the additional One Cup One Life (these GANSes do not get washed yet).
You harvest the GANSes from the different cups One Cup One Life and you add them to your 3rd glass jar.
When you have enough GANSes collected, you repeat again the washing process as in example 1\2\3\4, as explained above, until you have clean Plasma Water.
You can also keep on adding the Amino Acids from all your other One Cup One Life to the 1st glass jar you used from the first One Cup One Life and keep them safe for later.
You take the top layer above the GANS only. Use the clear Plasma Water above the GANS.
Never use the GANS at the bottom of the jars because the field strength is to high to consume.
Do not eat, drink or touch GANS !
Storing of GANSes
Application of Plasma Water
Utilities
Plasma Water application preventive from the One Cup One Life
Repeat this process before bedtime and when you get up in the morning:
Wet your head (not completely)
Spray your front chest and the back.
Spray your throat and neck.
Wash your face and your nostrils.
Wash your hands.
Spray your clothing every time before you leave the house and when you return home.
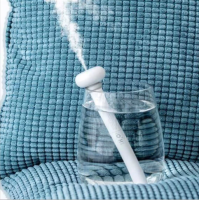
If possible, use a humidifier at all times at the front door, containing only pure Plasma Water from the One Cup One Life.
Drink 300, and up to 500 ml Plasma Water in little sips during the period of 24 hours.
Inhale the field strength above of the Plasma Water through a hubble bubble (breathing cup) without metal present in the hubble bubble or create and use a self-made plastic system.
Repeat the inhalation process a minimum of 3 times a day for duration of 10 to 15 minutes each time.
You use the same applications for all animals, as animals are exposed the same as humans to this virus. This application stands for all creatures that have blood running through their veins.
On advice of Mr Keshe, create per family 5 individual cups One Cup One Life, as each cup carries its own field strength.
Through the adding of the GANSes from the different One Cup One Life, you increase the fields .
Through the use and the presence of the 5 cups, you create sufficient enough field strength at this moment as a prevention. You mix the Plasma Water from the 5 One Cup One Life together and apply as explained above.
Additionally, in all cases
Involve every family member in the process.
Spray the Plasma Water of the One Cup One Life on the door handles.
Spray the Plasma Water of the One Cup One Life on the beds, tables, walls, car, curtains, clothing, shoes and winter covers like gloves and hats.
Spray all other objects like plastic curtains in the bathrooms, separation curtains in hospitals at risk of infection with Plasma Water One Cup One Life.
Your indoor pets as well as the outside animals, receive the same application of the Plasma Waters One Cup One Life. They receive the drinking water and spraying of their bodies and sleeping places from the finished Plasma Water from the One Cup One Life.
Wash the laundry with 500 ml Plasma Water.
Use the humidifier 24 hours continuously with Plasma Water.
Place several One Cup One Lifein the house. They will absorb the field strengths of the virus in these cups and deplete the virus from the rooms. The cups have to be filled every day with fresh Plasma Salt Water and the old Plasma Water has to be disposed of in the toilets and flushed through fast.
Application in case of infection
Apply in a Spray, the ready washed Plasma Water of the One Cup One Life every hour .
On your chest front and back.
Wet your face.
Wash your hands.
Wash your head. (not completely wet).
Drink with a 15-30 minute interval 50 ml, up to 700 ml a day.
Inhale 1-2 times per hour 10-15 minutes at a time.
Wash regularly hands and nostrils.
Spray the clothes and bedding regularly.
Spray the door handles and other objects like plastic curtains in the bathrooms at risk of infection with Plasma Water One Cup One Life.
Additional protection for the caretakers and caring family members
Before any person enters the room of an infected person, you apply before entering and leaving the room.
Use a Mask.
Wet your head (not completely).
Spray your front chest and the back.
Spray your throat and neck.
Wash your face and your nostrils.
You wash your hands.
And drink 20 ml of Plasma Water.
Additional information
How to use a mask
Use a mask, never touch it directly and always put it on and take it off at the rubber bands.
Before you take off the mask, spray it with your Plasma Water One Cup One Life. Wait for 3 minutes before removing.
To clean the mask, put it in a bowl with Plasma Water One Cup One Life for 10 - 15 minutes.
After drying you can use the mask again.
It is good if you put the cleaned mask back on in a slightly moist state.
Other
Prevent shaking hands with other people and don’t apply the normal welcome kisses and hugging.
Different additional information
Additional explanation on the fire Nano-coating of the One Cup One Life
The understanding of the fire coating before the winding around the pencil is as follows: You create space gaps in your Nano-coating layers.
Explained in the different Thursday teachings of MT Keshe.
Instead of using the fire Nano-coating you can apply the caustic soda method.
The Nano-coating process can be without the chicken mesh present.
In this process of applying the caustic soda method https://en.kfwiki.org/wiki/Category:Nano-coating
Application with battery or without
A nearly flat battery is only used to speed up the process of production of the GANSes.
Instead of using a battery you can place a Copper wire between the connections.
New: Twin Cup of One Cup One Life
The applications are identical to the first One Cup One Life.
MT Keshe has added in the teaching 318th Knowledge Seekers Workshop the blueprint of the Twin One Cup One Life:
Finishing words and links for help
Keep strictly to the above described "Applications in case of any infection!"
Be careful and cautious!
You will find help in the following international Telegram language groups.
Keshe One World Family: https://t.me/joinchat/I2ksVVbvb7OjcDR_3qSugQ
Established language groups on Telegram are Portuguese, Farsi, Italian, Keshe One World Family and more will follow.
First edition video of the One Cup One Life created for the first emergency relief in China: https://mega.nz/#F!RXwi2QSb!HqqCqSiflkaD7X5FFssnMg
This page and information was updated 2020-03-10
