Difference between revisions of "Testpage general"
(Infinity Loop pictures inserted) (Tag: Visual edit) |
|||
| Line 5: | Line 5: | ||
File:Infinity Loop 1f.jpg| | File:Infinity Loop 1f.jpg| | ||
</gallery>d | </gallery>d | ||
| + | |||
| + | === Production of the bare Copper coil === | ||
| + | For the Second Cup of Life, two coils are made from stranded Copper wire. One that is used as a bare wire and one that is used for the Nano-coating application. Approx. 30 cm (11.8 inches) of wire is needed per coil. | ||
| + | |||
| + | |||
| + | ==== Preparation of the Copper stranded wire ==== | ||
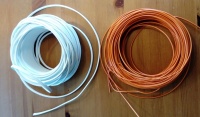
| + | Stranded wire is characterized by the fact that many small strands together form a wire. (See photo). You can find it in the hardware store, at an electrical store, or in an emergency, at home, in the power cables of your hair dryer, radio, television, coffee machine, etc. To do this, simply '''unplug''' the power cable from the outlet. Cut the entire electrical cord off of the appliance to use the whole cord. | ||
| + | |||
| + | <gallery mode="nolines" widths="200" heights="200"> | ||
| + | File:OneCup OneLife - different cables.jpg| | ||
| + | File:OneCup OneLife - Stranded wire.jpg| | ||
| + | </gallery> | ||
| + | |||
| + | |||
| + | ====Removing the plastic from the wire==== | ||
| + | Usually there are two or three wires in a power cable. The plastic outer sheath must first be removed. There are several ways to do this. (If you buy stranded wires separately, this step is not necessary) | ||
| + | |||
| + | |||
| + | =====Variant 1===== | ||
| + | One way to remove the outer sheath is to have the knife in one hand, place the cable on it and press it with your thumb carefully. With the other hand, as well as with the thumb you turn the cable and the knife cuts deeper and deeper into the plastic. Once you have reached the inner wires you can pull the separated plastic part from the inner wires. This is how you proceed step by step until the inner cables are exposed.<gallery mode="nolines" widths="200" heights="200"> | ||
| + | File:OneCup OneLife - Cutting and Stripping off the wire 1.jpg| | ||
| + | File:OneCup OneLife - Cutting and Stripping off the wire 2.jpg| | ||
| + | File:OneCup OneLife - Cutting and Stripping off the 3.jpg| | ||
| + | File:OneCup OneLife - Cutting and Stripping off the wire 4.jpg| | ||
| + | File:OneCup OneLife - Cutting and Stripping off the wire 5.jpg| | ||
| + | </gallery> | ||
| + | |||
| + | =====Variant 2===== | ||
| + | Another possibility is to place the cable on the table and hold it with one hand. Press the blade at a slight angle and with the other hand simply pull the cable backwards against the cutting direction. This way you take off a part of the plastic and can take the wires out. | ||
| + | |||
| + | Everyone has different approaches. With a little bit of trying you will find what way works best for you.<gallery mode="nolines" widths="200" heights="200"> | ||
| + | File:OneCup OneLife - Cutting the plastic around the wires with a knife 1.jpg| | ||
| + | File:OneCup OneLife - Cutting the plastic around the wires with a knife 2.jpg| | ||
| + | File:OneCup OneLife - Cutting the plastic around the wires with a knife 3.jpg| | ||
| + | File:OneCup OneLife - Cutting the plastic around the wires with a knife 4.jpg| | ||
| + | File:OneCup OneLife - Cutting the plastic around the wires with a knife 5.jpg| | ||
| + | </gallery> | ||
| + | |||
| + | ====Stripping off the plastic around the strands==== | ||
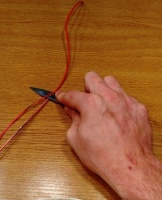
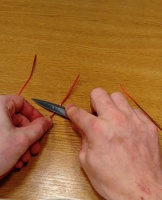
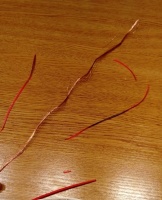
| + | Now you have exposed 2 or 3 wires, which are also covered with plastic. For these wires it is best to use variant 2 to remove the plastic. Do the same as above, especially with the stranded wire, it might require some practice. Put the knife with the cutting edge back at a slight angle, with a little pressure on the plastic, and pull the wire with the other hand underneath. If you hold the knife too steep, or press too hard, you might cut into the thin strands. If you hold the knife too loosely you might slide up over the plastic and start again at the same place. Don't worry, a few cut-through strands are no problem. With some practice you will get better quickly. Remove the plastic completely.<gallery mode="nolines" widths="200" heights="200"> | ||
| + | File:OneCup OneLife - Stripping of plastic around the strands 1.jpg| | ||
| + | File:OneCup OneLife - Stripping of plastic around the strands 2.jpg| | ||
| + | File:OneCup OneLife - Stripping of plastic around the strands 3.jpg| | ||
| + | File:OneCup OneLife - Stripping of plastic around the strands 4.jpg| | ||
| + | </gallery> | ||
| + | |||
| + | ====Twisting together the individual strands of the wire==== | ||
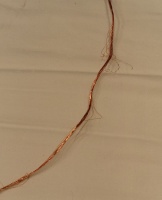
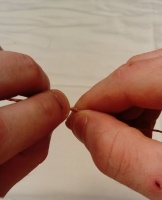
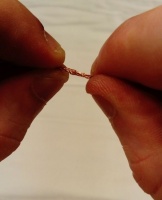
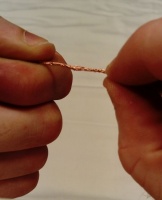
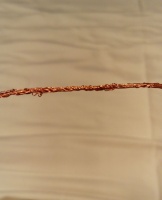
| + | Hold one end of the wire strands in one hand and the other end in the other hand. With your fingers twist the strands together starting on one end and continue to twist all the way to the other end. Make sure you are twisting the strands firmly together and have secured any fine strands that were cut short into the group.<gallery mode="nolines" widths="200" heights="200"> | ||
| + | File:OneCup OneLife - Twisting the strands together 1.jpg| | ||
| + | File:OneCup OneLife - Twisting the strands together 2.jpg| | ||
| + | File:OneCup OneLife - Twisting the strands together 3.jpg| | ||
| + | File:OneCup OneLife - Twisting the strands together 4.jpg| | ||
| + | File:OneCup OneLife - Twisting the strands together 5.jpg| | ||
| + | </gallery> | ||
<gallery widths="200" heights="200"> | <gallery widths="200" heights="200"> | ||
Revision as of 10:47, 24 April 2020
Contents
Production of the bare Copper coil
For the Second Cup of Life, two coils are made from stranded Copper wire. One that is used as a bare wire and one that is used for the Nano-coating application. Approx. 30 cm (11.8 inches) of wire is needed per coil.
Preparation of the Copper stranded wire
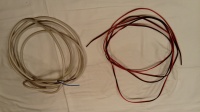
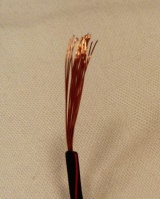
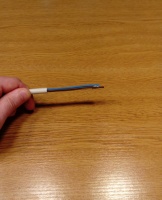
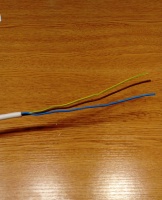
Stranded wire is characterized by the fact that many small strands together form a wire. (See photo). You can find it in the hardware store, at an electrical store, or in an emergency, at home, in the power cables of your hair dryer, radio, television, coffee machine, etc. To do this, simply unplug the power cable from the outlet. Cut the entire electrical cord off of the appliance to use the whole cord.
Removing the plastic from the wire
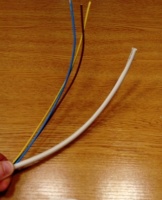
Usually there are two or three wires in a power cable. The plastic outer sheath must first be removed. There are several ways to do this. (If you buy stranded wires separately, this step is not necessary)
Variant 1
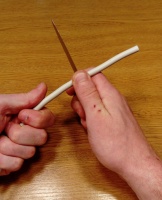
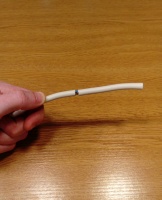
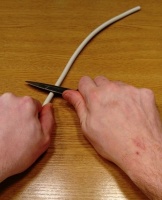
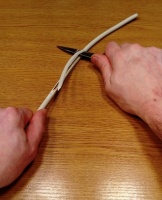
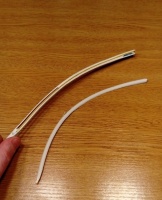
One way to remove the outer sheath is to have the knife in one hand, place the cable on it and press it with your thumb carefully. With the other hand, as well as with the thumb you turn the cable and the knife cuts deeper and deeper into the plastic. Once you have reached the inner wires you can pull the separated plastic part from the inner wires. This is how you proceed step by step until the inner cables are exposed.Variant 2
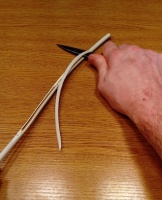
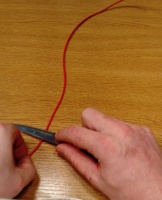
Another possibility is to place the cable on the table and hold it with one hand. Press the blade at a slight angle and with the other hand simply pull the cable backwards against the cutting direction. This way you take off a part of the plastic and can take the wires out.
Everyone has different approaches. With a little bit of trying you will find what way works best for you.